Hi Friends,
Let me introduce you to our new kitchen. There are things I appreciate about it, including the storage space. Our last kitchen didn’t have nearly this many cabinets and I always struggled to make room for pots and pans and serving ware, etc. There are also so many things about this space that are pain points for me. All of them will be fixed someday when this space gets fully demo’d and we build a new kitchen. For now, I settled on fixing a few of them in order to have a space I don’t mind cooking in for the time being.

First thing to go had to be the golden oak/honey oak. Whatever you want to call it – I know some people think this view is beautiful but all I see is the color orange. It hurts my eyes, so it needed to go. I do appreciate the commitment though. The former homeowner loved this oak so much they carried it from the cabinets, to the floors, into the light fixtures, and even the cabinet hardware. I have not seen this level of devotion in many other homes.

Then I needed to address the lighting. This light looks like belongs in a pool hall, not a kitchen. The shades themselves were actually a really pretty stained glass but the scale and everything else about it was off. It’s also right above the cooktop which means it gets super dirty anytime you cook something, but that’s a problem for another day.

Third area that desperately needed addressing was this sink area. The trim between the sink cabinets was making it feel claustrophobic so that needed to go. I’ve also had a kitchen faucet in my closet for a couple years looking for a home and this seemed like the perfect spot.

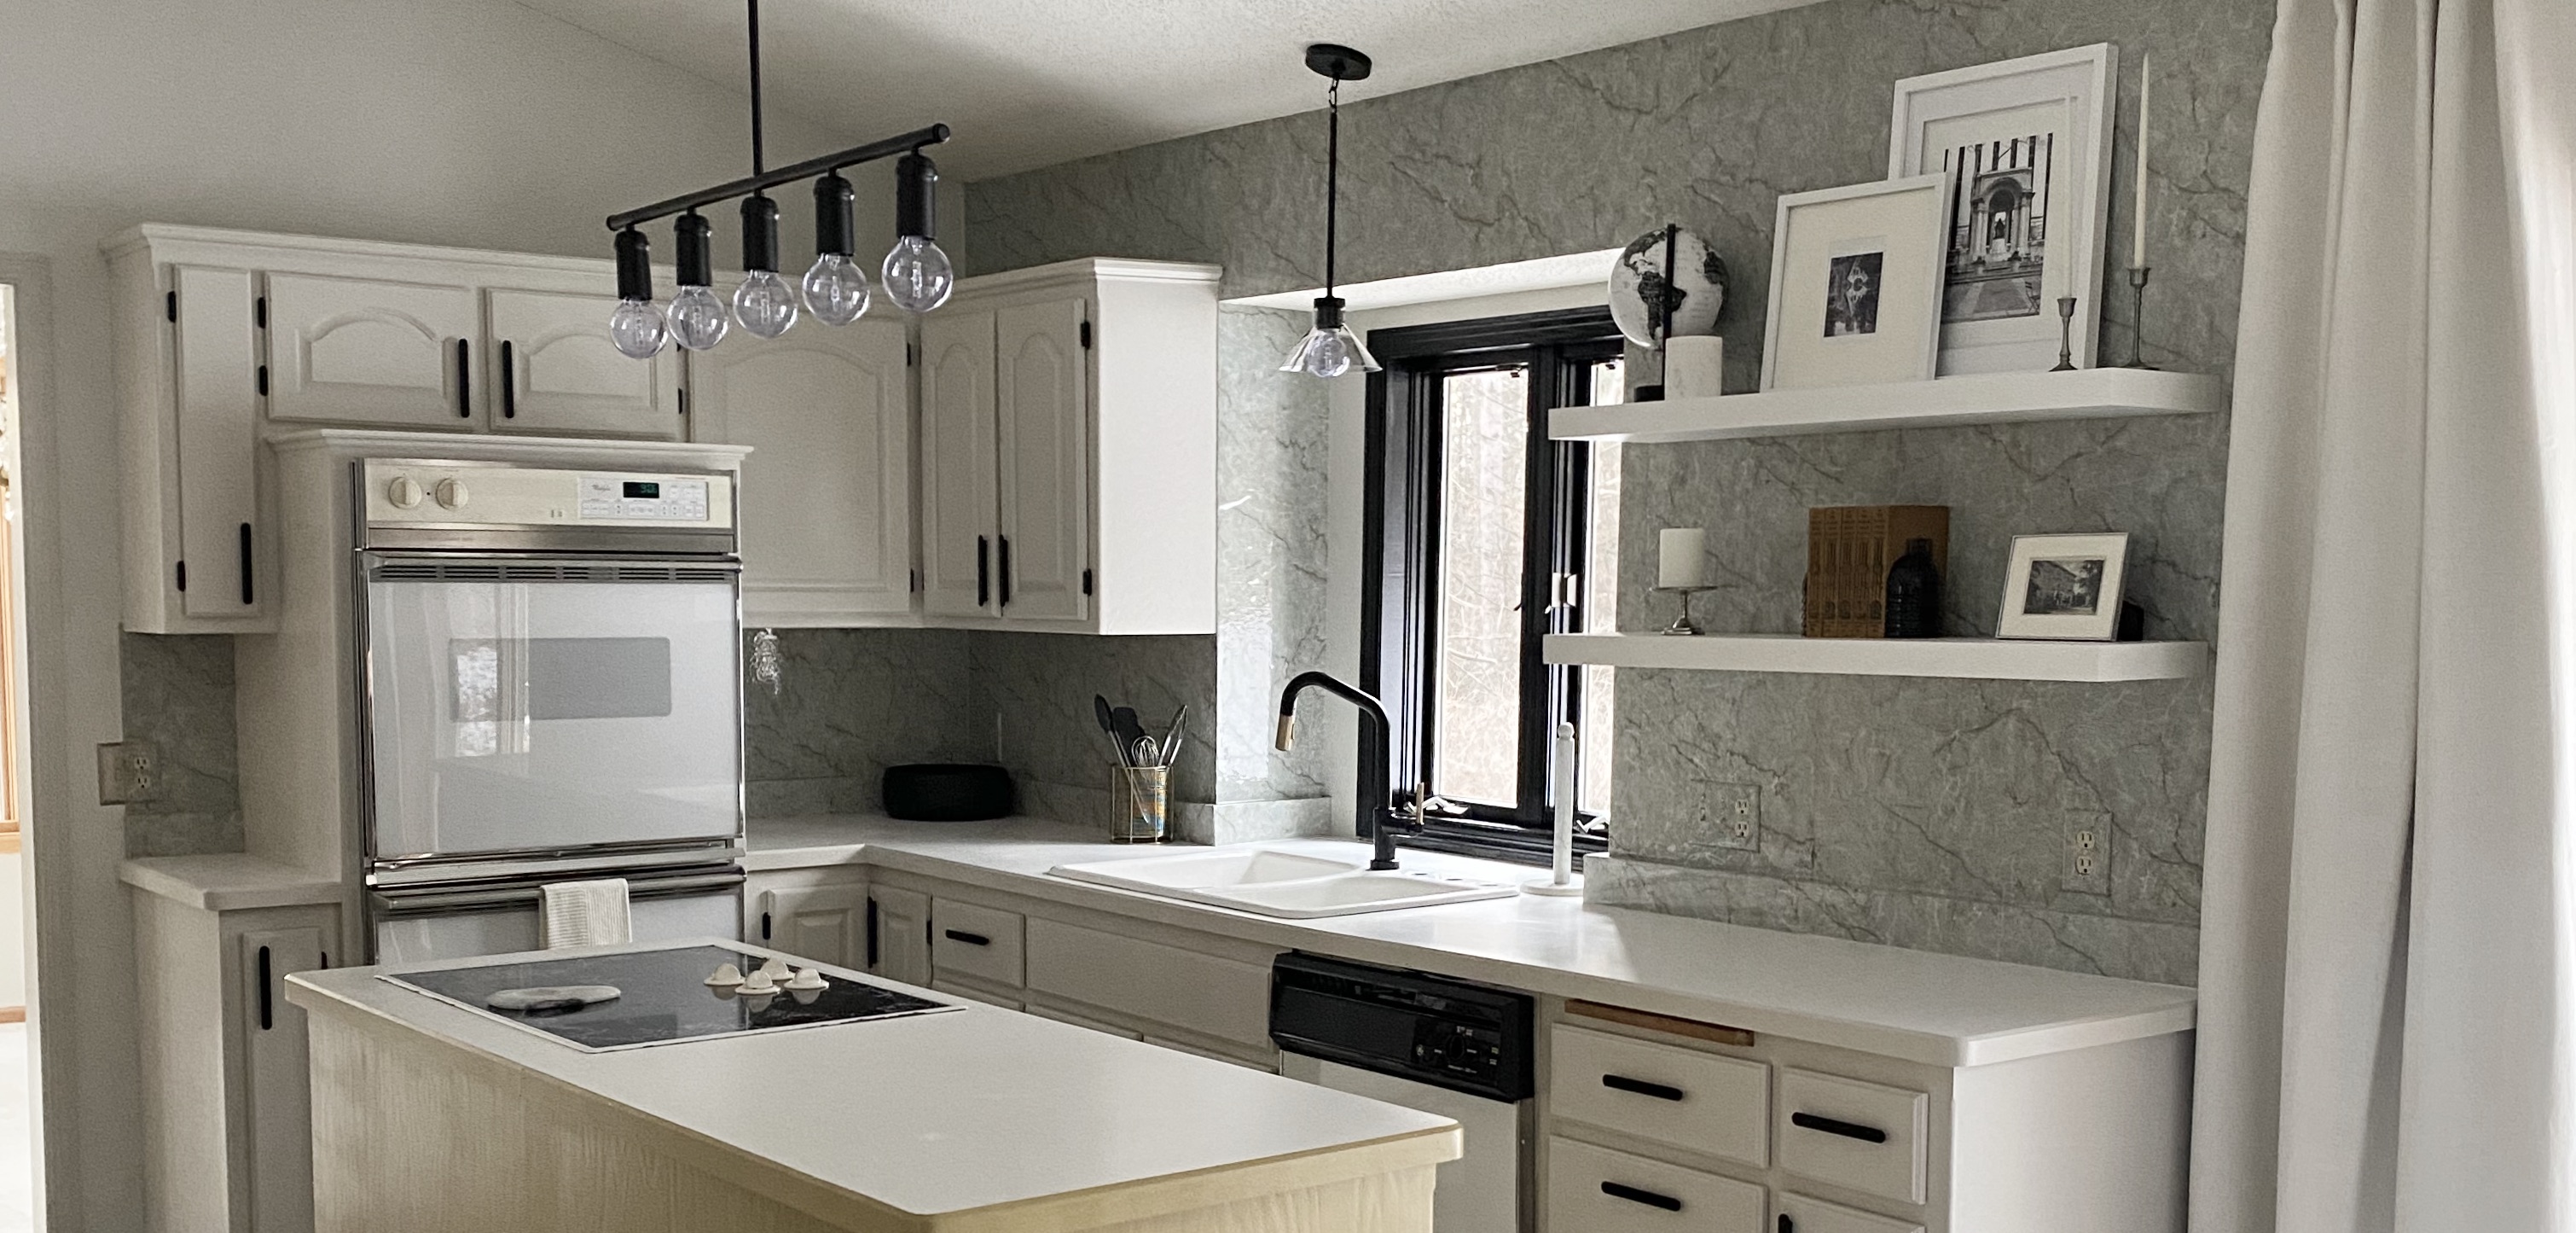
Almost this entire transformation is made possible because of paint. It’s the easiest way to make a huge difference for the least amount of money. I painted our perimeter cabinets SW Modern Gray and the island cabinet SW Peristyle Brass. Then the walls got a coat of SW Moderne White and the base trim SW Agreeable Gray. I also painted a couple inches above the baseboards the same color as the trim to make them look a little thicker. It’s an inexpensive way to modernize the trim a bit.

The floors probably deserve their own post for how long they took to complete. Would you believe I painted those too? They were in rough shape and since the majority of our main level is carpet, there wasn’t too much to cover. Started with a straight coat of white porch and patio paint (Ice White by Behr). Then spent 3 weekends of my life taping off squares and a pretty little border to paint Tar Black by Behr. Then more Ice White, when some of the paint stripped by tearing the tape up. Then finally a hefty coat of gloss polyurethane (Varathane Ultimate Polyurethane) to protect them. It makes me SO happy that there’s no more orange floor.

We removed the cabinet next to the sink and I replaced it with these floating shelves. I also did a peel and stick wallpaper all along this whole back wall and continued it along the other backsplash areas. It’s so pretty but also glossy so it’s easy to wipe down.

The window trim got a couple coats of Minwax Gel Stain in black. It paired nicely with my new black cabinet pulls and black and gold Brizo Litze faucet. The pendant light above the sink I scored on clearance for $11 and gave it a coat of black spray paint to tie in to all the other black finishes.

The ceiling medallion for the island light is one of my favorite things. Even if I did drop it on my head by stubbornly trying to install it myself – oops. It’s a bit of traditional mixed with a clean lines modern light fixture that is the perfect blend of what I was trying to achieve with this space. The best part is that all this was under $700 to do and it looks like a completely new kitchen! What do you think?
Thanks for reading,

Links:
Cabinet Hardware//
Island Pendant//
Ceiling Medallion//
Brizo Faucet//
Floating Shelves//
Peel and Stick Backsplash//
Floor Paint//
Cabinet Paint//
Floor Polyurethane//
Cabinet and Floor Primer//
Sink Pendant//
Curtain Rod//
Curtain Panels//
